
物联网入门之MQTT协议(一)
发布于 2025-07-28 17:00:54
代码可运行
关联问题
换一批
MQTT是一种基于发布/订阅模式的“轻量级”通讯协议,该协议构建于TCP/IP协议上,MQTT最大优点在于,用极少的代码和有限的带宽,为连接远程设备提供实时可靠的消息服务。
PART.1
安装
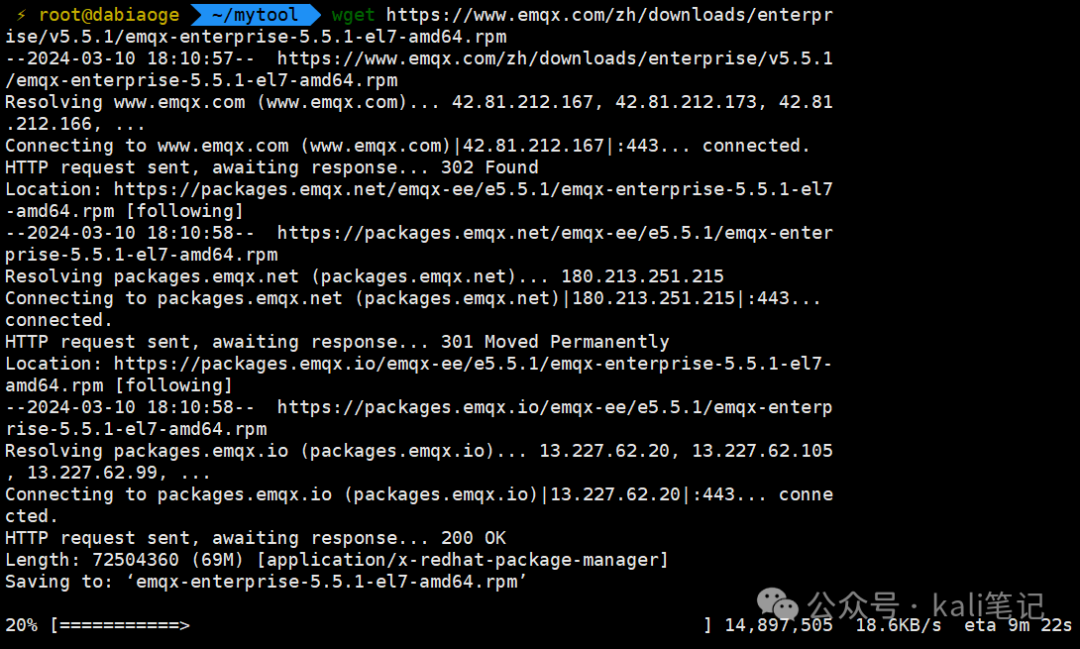
我们首先在官网根据系统类型下载安装包。这里我们以Centos7为例。
wget https://www.emqx.com/zh/downloads/enterprise/v5.5.1/emqx-enterprise-5.5.1-el7-amd64.rpm
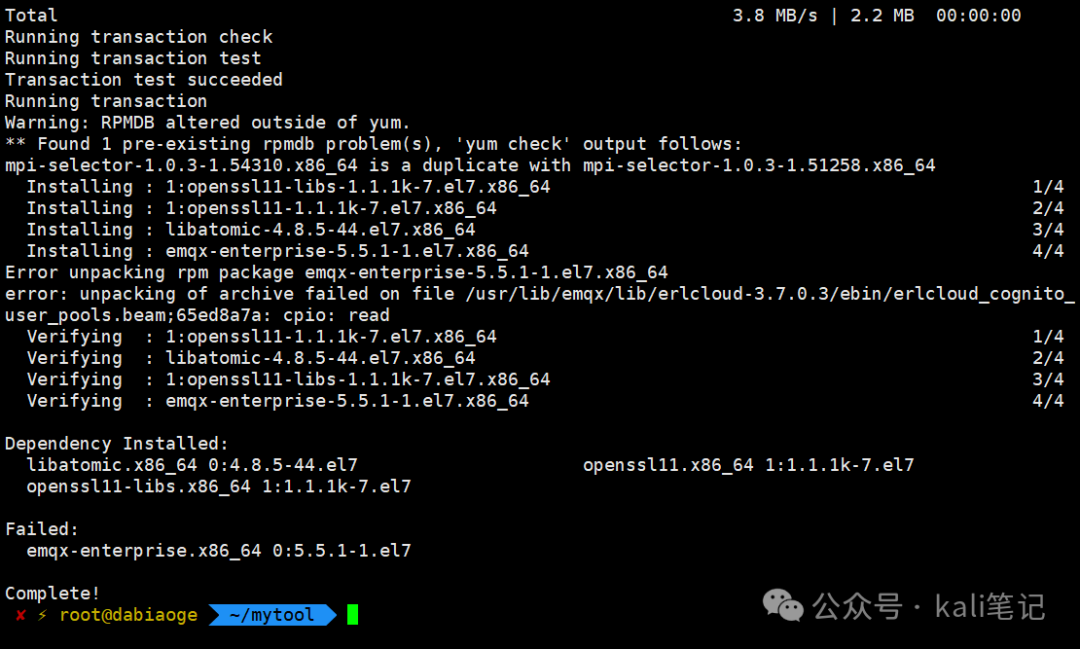
接下来,执行下面命令进行安装。
yum install emqx-enterprise-5.5.1-el7-amd64.rpm -y
# 源码安装
mkdir -p emqx && tar -zxvf emqx-enterprise-5.5.5-el7-amd64.tar.gz -C emqx
启动
./emqx/bin/emqx start
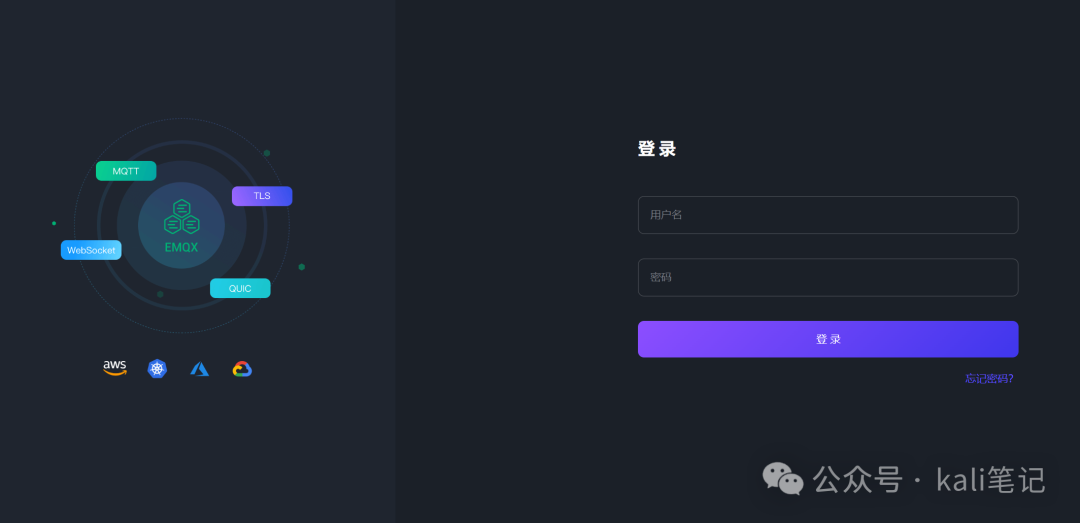
访问ip:18083然后输入初始账号admin public登录。
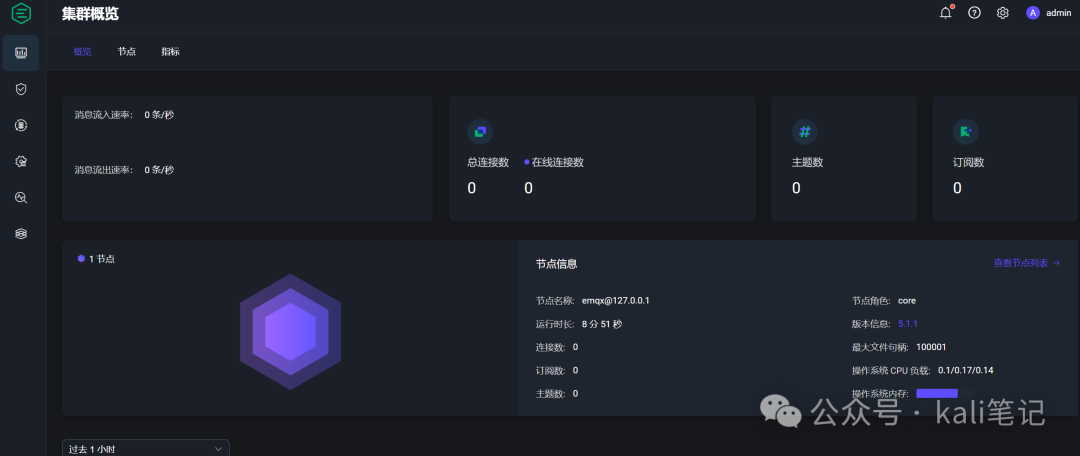
登录后效果
PART.2
MQTT开灯/关灯
在esp8266中写入代码
#include <ESP8266WiFi.h>
#include <PubSubClient.h>

// GPIO 5 D1
#define LED 5

// WiFi
const char *ssid = "mousse"; // Enter your WiFi name
const char *password = "qweqweqwe";  // Enter WiFi password

// MQTT Broker
const char *mqtt_broker = "broker.emqx.io";
const char *topic = "esp8266/led";
const char *mqtt_username = "emqx";
const char *mqtt_password = "public";
const int mqtt_port = 1883;

bool ledState = false;

WiFiClient espClient;
PubSubClient client(espClient);

void setup() {
    // Set software serial baud to 115200;
    Serial.begin(115200);
    delay(1000); // Delay for stability

    // Connecting to a WiFi network
    WiFi.begin(ssid, password);
    while (WiFi.status() != WL_CONNECTED) {
        delay(500);
        Serial.println("Connecting to WiFi...");
    }
    Serial.println("Connected to the WiFi network");

    // Setting LED pin as output
    pinMode(LED, OUTPUT);
    digitalWrite(LED, LOW);  // Turn off the LED initially

    // Connecting to an MQTT broker
    client.setServer(mqtt_broker, mqtt_port);
    client.setCallback(callback);
    while (!client.connected()) {
        String client_id = "esp8266-client-";
        client_id += String(WiFi.macAddress());
        Serial.printf("The client %s connects to the public MQTT broker\n", client_id.c_str());
        if (client.connect(client_id.c_str(), mqtt_username, mqtt_password)) {
            Serial.println("Public EMQX MQTT broker connected");
        } else {
            Serial.print("Failed with state ");
            Serial.print(client.state());
            delay(2000);
        }
    }

    // Publish and subscribe
    client.publish(topic, "hello emqx");
    client.subscribe(topic);
}

void callback(char *topic, byte *payload, unsigned int length) {
    Serial.print("Message arrived in topic: ");
    Serial.println(topic);
    Serial.print("Message: ");
    String message;
    for (int i = 0; i < length; i++) {
        message += (char) payload[i];  // Convert *byte to string
    }
    Serial.print(message);
    if (message == "on" && !ledState) {
        digitalWrite(LED, HIGH);  // Turn on the LED
        ledState = true;
    }
    if (message == "off" && ledState) {
        digitalWrite(LED, LOW); // Turn off the LED
        ledState = false;
    }
    Serial.println();
    Serial.println("-----------------------");
}

void loop() {
    client.loop();
    delay(100); // Delay for a short period in each loop iteration
}
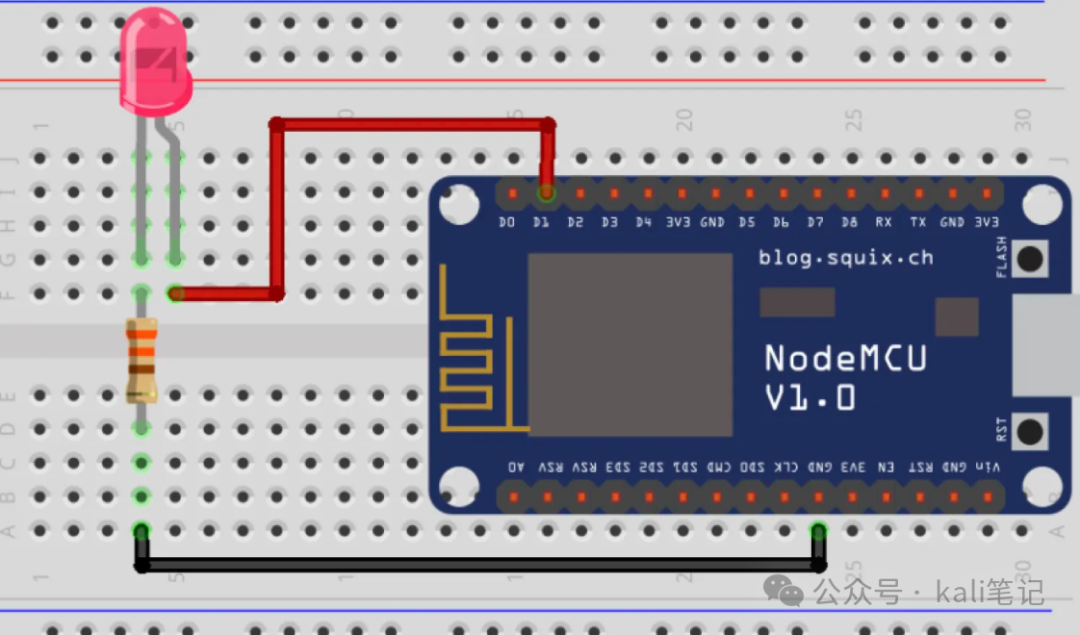
线路连接。
接着,我们利用mqtt工具连接服务器,便可以实现开灯/关灯操作。

本文参与 腾讯云自媒体同步曝光计划,分享自微信公众号。
原始发表:2024-03-10,如有侵权请联系 cloudcommunity@tencent.com 删除
声明:本站所有文章,如无特殊说明或标注,均为本站原创发布。任何个人或组织,在未征得本站同意时,禁止复制、盗用、采集、发布本站内容到任何网站、书籍等各类媒体平台。如若本站内容侵犯了原著者的合法权益,可联系我们进行处理。